maven quick start
[TOC]
安装maven
Maven – Installing Apache Maven
安装完成执行 mvn -v
使用maven模板快速创建一个项目
mvn archetype:generatecreate a new project based on an Archetype-
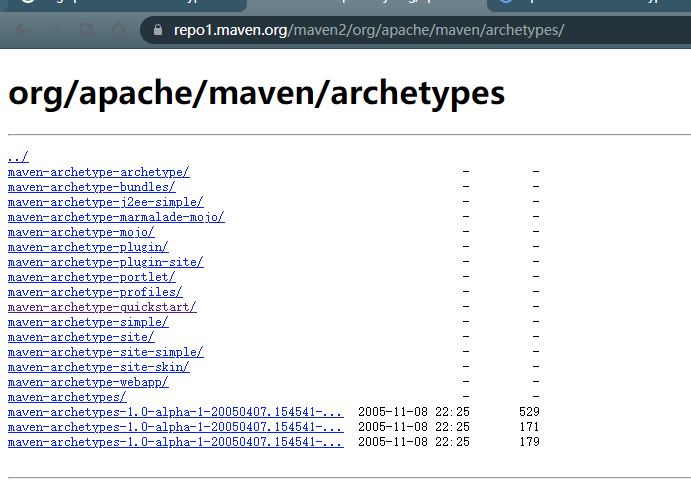
-DarchetypeGroupId=org.apache.maven.archetypes -DarchetypeArtifactId=maven-archetype-quickstart指定了使用模板 https://repo1.maven.org/maven2/org/apache/maven/archetypes/maven-archetype-quickstart/
-
-DgroupId=com.mulang.xtool.demo当前项目的group id. -
-DartifactId=whtest当前项目的artofactId
[wjh@node1 xtool_demo]$ mvn archetype:generate -DarchetypeGroupId=org.apache.maven.archetypes -DarchetypeArtifactId=maven-archetype-quickstart   -DgroupId=com.mulang.xtool.demo -DartifactId=whtest


[wjh@node1 xtool_demo]$ tree whtest
whtest
├── pom.xml
└── src
    ├── main
    │   └── java
    │       └── com
    │           └── mulang
    │               └── xtool
    │                   └── demo
    │                       └── App.java
    └── test
        └── java
            └── com
                └── mulang
                    └── xtool
                        └── demo
                            └── AppTest.java


//项目源码放置在src/main/java/com/mulang/xtool/demo/
//查看生成的类的package,会是创建工程时的groupId
[wjh@node1 whtest]$ cat src/main/java/com/mulang/xtool/demo/App.java
package com.mulang.xtool.demo;

/**
 * Hello world!
 *
 */
public class App
{
    public static void main( String[] args )
    {
        System.out.println( "Hello World!" );
    }
}
修改pom.xml
指定jdk8
pom.xml 中maven.compiler 1.7 改为1.8

[wjh@node1 whtest]$ cat pom.xml |grep maven.compiler
    <maven.compiler.source>1.8</maven.compiler.source>
    <maven.compiler.target>1.8</maven.compiler.target>
打包
maven-jar-plugin 这个插件将maven工程打成 jar 包
https://maven.apache.org/plugins/maven-jar-plugin/
https://maven.apache.org/shared/maven-archiver/index.html
[wjh@node1 whtest]$ grep maven-jar-plugin pom.xml -A 2 -B 1
        <plugin>
          <artifactId>maven-jar-plugin</artifactId>
          <version>3.0.2</version>
        </plugin>

// 改为
[wjh@node1 whtest]$ grep maven-jar-plugin pom.xml -A 15 -B 1
        <plugin>
                <artifactId>maven-jar-plugin</artifactId>
                <version>3.0.2</version>
                <configuration>
                        <archive>
                                <manifest>
                                        <!--是否要把第三方jar放到manifest的classpath中-->
                                        <addClasspath>true</addClasspath>
                                        <!--生成的manifest中classpath的前缀,因为要把第三方jar放到lib目录下,所以classpath的前缀是lib/-->
                                        <classpathPrefix>lib/</classpathPrefix>
                                        <!-- 执行的主程序路径 -->
                                        <mainClass>com.mulang.xtool.demo.App</mainClass>
                                </manifest>
                        </archive>
                </configuration>
        </plugin>
        <plugin>
把依赖拷贝到指定的lib目录
https://maven.apache.org/plugins/maven-dependency-plugin/usage.html
- 使用maven-dependency-plugin 拷贝依赖到指定目录.
-
这个插件需要放在
外面. 因为如果项目有多个模块,每个模块的依赖可能是不同的. 不能用pluginManagement统一管理. - https://stackoverflow.com/questions/10483180/what-is-pluginmanagement-in-mavens-pom-xml
You use
pluginManagementin aparent pomto configure it in case anychild pomwants to use it, but not every child plugin wants to use it. An example can be that yoursuper pomdefines some options for the maven Javadoc plugin.Not each
child pommight want to use Javadoc, so you define those defaults in apluginManagementsection. The child pom that wants to use the Javadoc plugin, just defines a plugin section and will inherit the configuration from thepluginManagementdefinition in theparent pom.
示例pom.xml片段
  ...
  <build>

          <plugins>
                  <plugin>
                  <groupId>org.apache.maven.plugins</groupId>
                  <artifactId>maven-dependency-plugin</artifactId>
                  <version>3.2.0</version>
                  <executions>
                  <execution>
                  <id>copy-dependencies</id>
                  <phase>prepare-package</phase>
                  <goals>
                  <goal>copy-dependencies</goal>
                  </goals>
                  <configuration>
                  <outputDirectory>${project.build.directory}/lib</outputDirectory>
                  <!-- Using the default settings (overWriteReleases = false, overWriteSnapshots = false, overWriteIfNewer = true) -->
                  <!-- If overWriteReleases = true, then a release artifact (ie foo-1.0.jar) will always overwrite. -->
                  <overWriteReleases>true</overWriteReleases>
                  <!-- If overWriteSnapshots = true, then a snapshot artifact (ie foo-1.0-SNAPSHOT.jar) will always overwrite. -->
                  <overWriteSnapshots>true</overWriteSnapshots>
                  <overWriteIfNewer>true</overWriteIfNewer>
                  </configuration>
                  </execution>
                  </executions>
                  </plugin>
          </plugins>

    <pluginManagement><!-- lock down plugins versions to avoid using Maven defaults (may be moved to parent pom) -->
...


[root@node2 whtest01]# ../apache-maven-3.8.4/bin/mvn clean package

[root@node2 whtest01]# ls -alh target/lib/
total 4.2M
drwxr-xr-x.  2 root root   91 Jan  6 11:00 .
drwxr-xr-x. 10 root root  206 Jan  6 11:00 ..
-rw-r--r--.  1 root root  44K Jan  5 18:20 hamcrest-core-1.3.jar
-rw-r--r--.  1 root root 240K Jan  5 18:20 junit-4.11.jar
-rw-r--r--.  1 root root 3.9M Jan  5 18:20 netty-all-4.1.42.Final.jar


###执行时需要进入target文件夹
[root@node2 whtest01]# cd target/
[root@node2 target]# /etc/alternatives/java_sdk_11/bin/java -jar whtest01-1.0-SNAPSHOT.jar
Hello World!

###如果执行的程序需要依赖,可以配置classpath 运行.
[root@node2 target]# java -classpath ./whtest-1.0-SNAPSHOT.jar:./lib/*   com.mulang.xtool.demo.TcpServer
mvn 命令
// 清除编译代码
mvn clean

// 打包
mvn package

mvn clean package

// 打包,但跳过单元测试
mvn package -Dmaven.test.skip=true


[wjh@node1 whtest]$ java -jar target/whtest-1.0-SNAPSHOT.jar
Hello World!
迁移项目到maven
- 先使用模板生成项目原型
- 将源码移动到指定的位置.
groupId=com.mulang.xtool.demo那么要把源码相应放到src/main/java/com/mulang/xtool/demo
- 修改源码里类的package.
模块聚合
将顶级的pom.xml 的package 声明为pom
   <groupId>com.mulang.xtool.demo</groupId>
   <artifactId>whtest</artifactId>
   <version>1.0-SNAPSHOT</version>
   <packaging>pom</packaging>
在顶级项目目录下,更加模板创建module.
// 进入top-level 项目根目录
[wjh@node1 whtest]$ pwd
/home/wjh/IdeaProjects/xtool_demo/whtest

// 创建一个netty 子模块
[wjh@node1 whtest]$ mvn archetype:generate -DarchetypeGroupId=org.apache.maven.archetypes -DarchetypeArtifactId=maven-archetype-quickstart   -DgroupId=com.mulang.xtool.demo -DartifactId=netty
[INFO] Scanning for projects...
[INFO]
[INFO] --------------------< com.mulang.xtool.demo:whtest >--------------------
[INFO] Building whtest 1.0-SNAPSHOT
[INFO] --------------------------------[ pom ]---------------------------------
[INFO]
...
[INFO] BUILD SUCCESS
[INFO] ------------------------------------------------------------------------
[INFO] Total time: 8.777 s
[INFO] Finished at: 2022-01-05T16:18:15+08:00
[INFO] ------------------------------------------------------------------------

// 增加了子模块netty
[wjh@node1 whtest]$ tree -L 3
.
├── netty
│   ├── pom.xml
│   └── src
│       ├── main
│       └── test
├── pom.xml
└── src
    ├── main
    │   └── java
    └── test
        └── java

// 展开文件夹
[wjh@node1 whtest]$ tree
.
├── netty
│   ├── pom.xml
│   └── src
│       ├── main
│       │   └── java
│       │       └── com
│       │           └── mulang
│       │               └── xtool
│       │                   └── demo
│       │                       └── App.java
│       └── test
│           └── java
│               └── com
│                   └── mulang
│                       └── xtool
│                           └── demo
│                               └── AppTest.java
├── pom.xml
└── src
    ├── main
    │   └── java
    │       └── com
    │           └── mulang
    │               └── xtool
    │                   └── demo
    │                       └── App.java
    └── test
        └── java
            └── com
                └── mulang
                    └── xtool
                        └── demo
                            └── AppTest.java

27 directories, 6 files
特别的mvn help:
Apache Maven Help Plugin – Introduction
The Help Plugin has 7 goals:
- help:active-profiles lists the profiles which are currently active for the build.
- help:all-profiles lists the available profiles under the current project.
- help:describe describes the attributes of a Plugin and/or a Mojo (Maven plain Old Java Object).
- help:effective-pom displays the effective POM as an XML for the current build, with the active profiles factored in. If
verbose, a comment is added to each XML element describing the origin of the line. - help:effective-settings displays the calculated settings as an XML for the project, given any profile enhancement and the inheritance of the global settings into the user-level settings.
- help:evaluate evaluates Maven expressions given by the user in an interactive mode.
- help:system displays a list of the platform details like system properties and environment variables.
#命令会打印出所有的Java系统属性和环境变量
mvn help:system

mvn help:effective-pom